You probably already know how important it is to have a backup process. In this article, we will look at performing a WordPress backup via FTP.
1. Importance of backup (by any means)
Setting up an effective system is a form of insurance for your website. That way, on the day that a most stressful incident occurs, such as a hack, an accidental error or an update that goes wrong, you can simply restore one of your backups in a matter of minutes and forget about the mishap straight away.
The easiest way to do this is to use a full-featured and robust plugin. Currently, the best solution is UpdraftPlus which offers free automated backups and restores in a few clicks.
However, sometimes you can’t install additional plugins or an automated system consumes too many resources on your server. In this case, WordPress FTP backup is a safe, if more time-consuming, way to preserve your site.
2. WordPress is made up of several distinct parts
WordPress consists of two distinct parts that will need to be saved. One is the database, and the other is the files. The database contains all the content of your site, such as posts, pages, comments, user accounts and other settings of WordPress and your plugins. In addition, the files contain the core WordPress code, themes and plugins, as well as your media and any content uploaded by users.
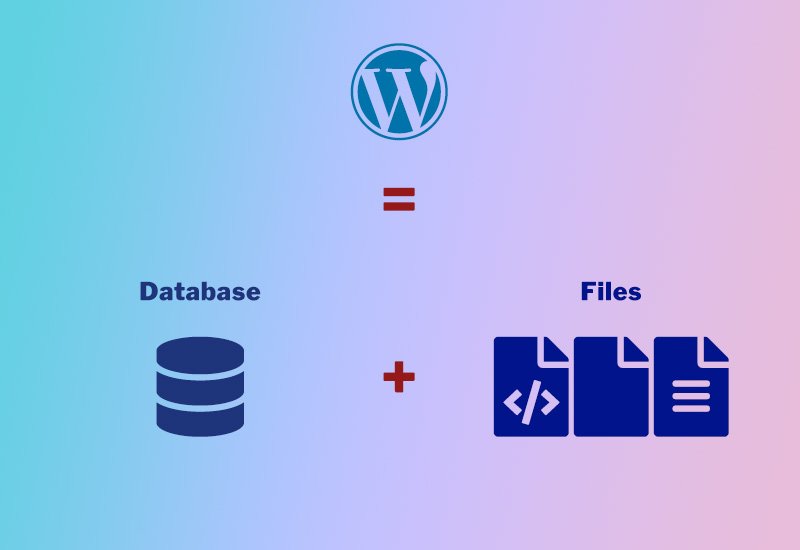
Whether this process is done manually or automatically, it is very important to copy both the database and the files. It is true that some files may be excluded from the backup, especially those in the WordPress core. These should never be modified and can be downloaded from the WordPress website.
In theory, it is possible to back up only the wp-config.php and .htaccess files, the wp-content folder and any other files you add to your site’s root folder. However, this implies that during a recovery and depending on the severity of the problem, it may be necessary to download and reinstall these files and folders, which will take more time. As a precaution, I recommend that you back up your entire root folder.
3. Making a WordPress FTP backup of files
A WordPress FTP backup only allows you to copy the files. As mentioned, the database is also crucial for the process to be useful. Therefore, it will be necessary, as a second step, to copy it as well.
3.1 How to connect via FTP
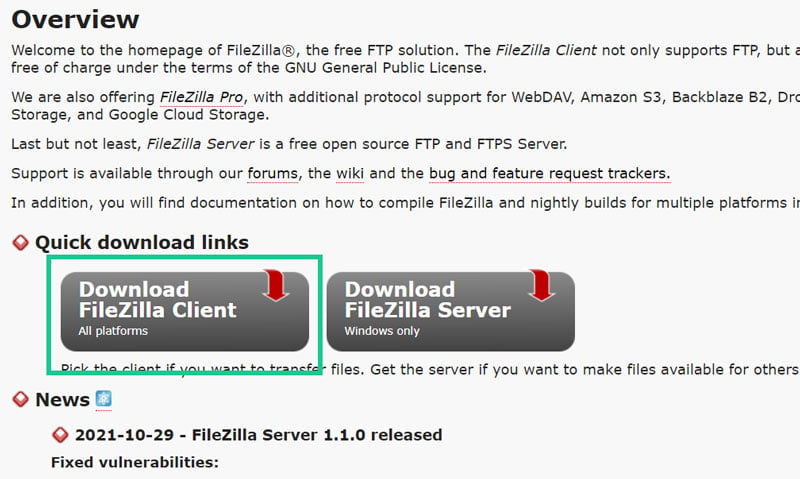
In order to copy the files, you first need to connect to your server via FTP. For this step, an FTP client is required. I recommend installing the FTP client FileZilla which is open source and has all the features you will need.
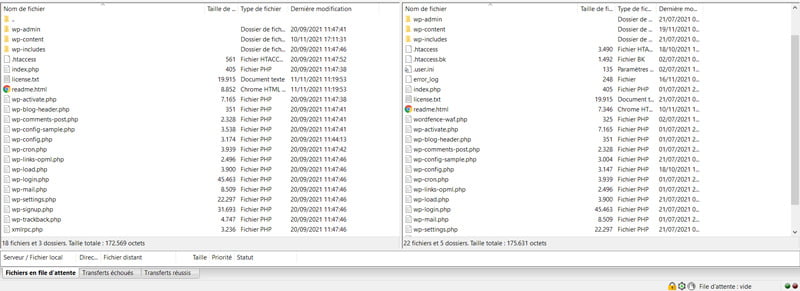
When opening the program, the local files are on the left and, after connecting, the server files are on the right.
The next step is to create an FTP account if you do not have one by default. Depending on your dashboard, things will look different. But you will need to find an FTP menu or FTP accounts that will allow you to create an account.

You will need to choose a username and password and associate either the root folder or the folder or directory of a specific site with this account. In this way, by connecting via FTP, you will be able to access that particular folder.
Next, you will need to enter the data required for your FTP connection: host name, login and password. Most often, these login details are found on your hosting account. Also, if you have just created an FTP account, you should have them at hand. If not, they were probably sent to you by email when you created your account with your hosting company.

If you can’t find your login credentials and can’t create an additional FTP account, I recommend contacting the company’s technical support. Also note that if you are using a service like Cloudflare, your hostname must explicitly be the IP address of your server. You will also find this on your hosting account.
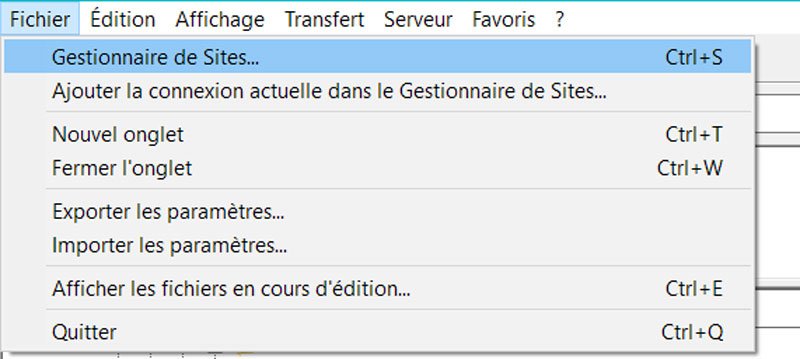
To make your later FTP connections easier, I recommend using the site manager available in FileZilla (File > Site Manager) which allows a one-click connection after configuration.
3.2 Copying files
After connecting to your server, you may need to navigate to the correct location. Usually your site is in a folder called public_html. There may be several sites in this folder. In this case, you should select the folder with the name of the site you want to save.
Once in the correct location, you will find a folder and file structure similar to this:
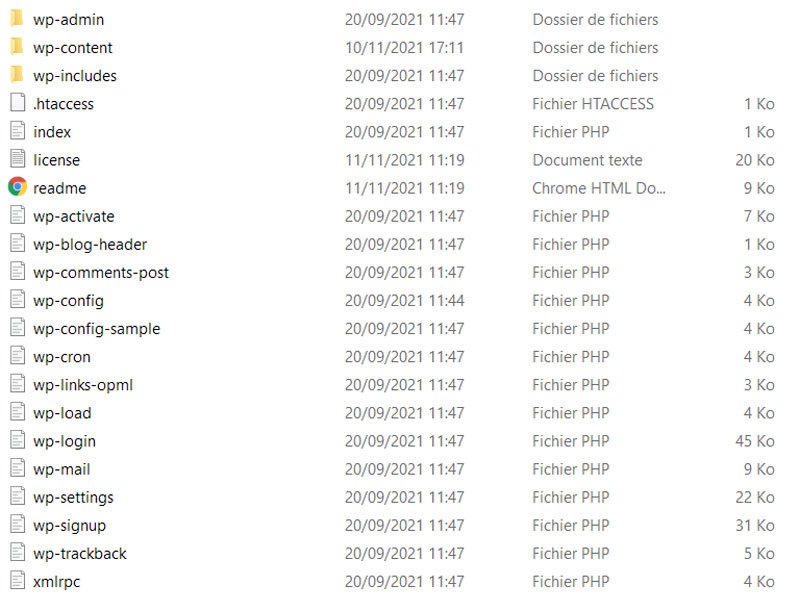
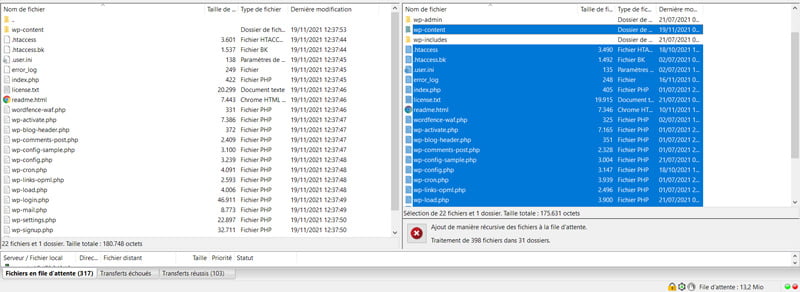
To back up your WordPress files, simply select all the folders and files on the right and copy them to your computer on the left with a simple drag and drop. It will be helpful to create a backup folder in which to keep the copied files.
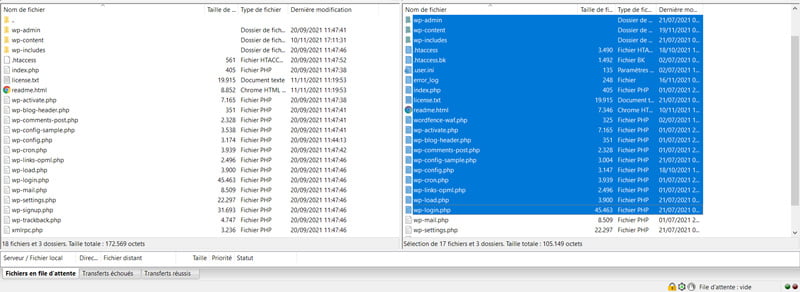
This process can take some time depending on the size of a site, especially if there are a lot of media files. To be effective, a WordPress FTP backup will need to be performed every time something is modified on your site.
4. Make a manual database backup
Without its database, a WordPress site cannot function properly. It contains the content of a site, but also the location of media on pages and in posts, as well as essential WordPress settings. So it’s important to back it up as well. First, you will need to log into the phpMyAdmin interface.
4.1 How to log into phpMyAdmin
Again, it is on your hosting account that you will find the necessary data to log in to this interface. You will need a direct link or a link to the login page. In the second case, you will need a username and password. Again, I recommend that you contact technical support if you cannot find these details on your hosting account.

4.2 Exporting the database
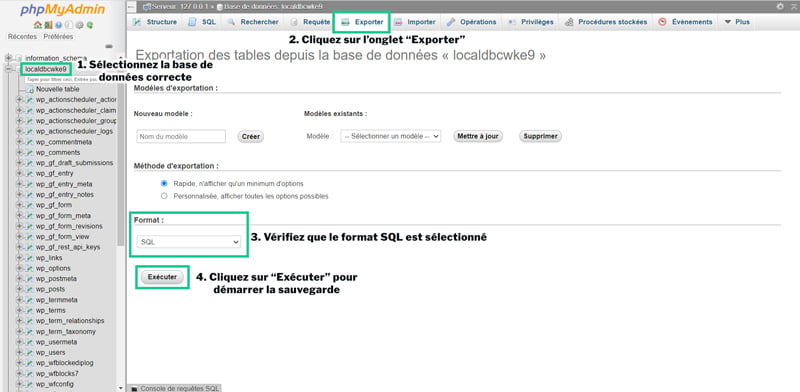
Once the connection has been established, it is essential to select the database corresponding to the site you wish to backup. If your hosting account only has one site, only one database should be in phpMyAdmin. If you have multiple sites, make sure you choose the correct database.
Without its name, you may not be able to find it. In this case, going back to the root folder of your server or to your files backup, you will be able to open the wp-config.php file with a text editor, for example Notepad++.
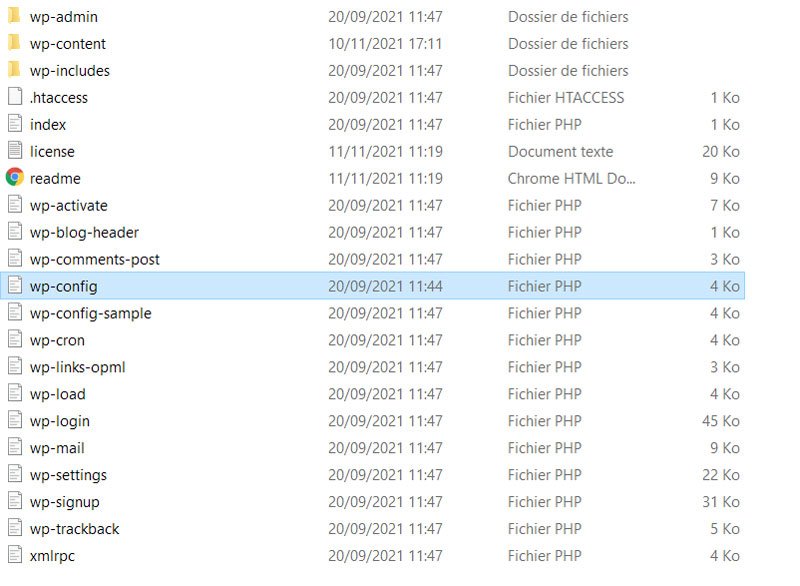
Then, to find the name of your database, locate the following line of code:
define('DB_NAME', 'name_of_your_database');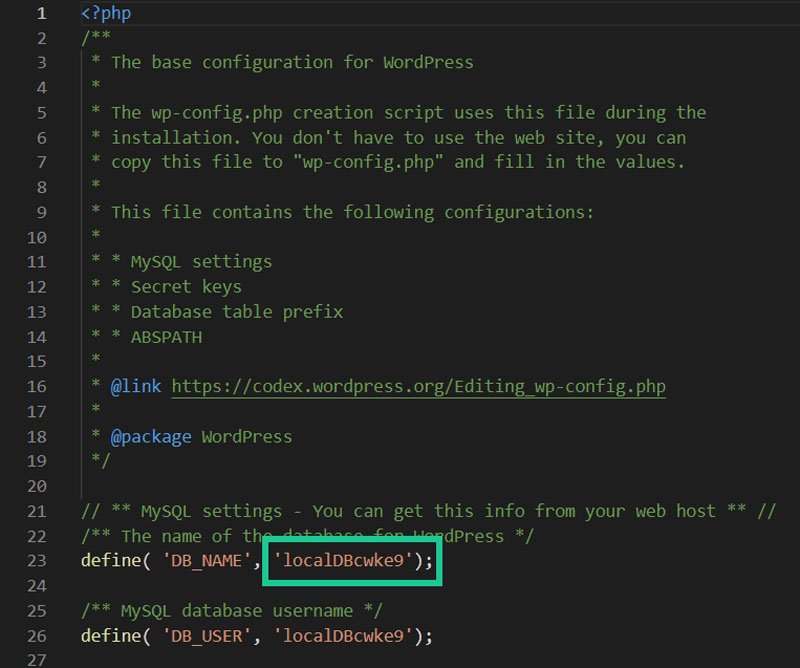
It is usually found towards the top of the document, just after the comment block. The last part of this line of code includes the name of your database, which will then be easy to locate.
Then select your site’s database in phpMyAdmin before clicking on the Export tab. Click on the Run tab to export a copy of your database. The file you download this way must have a « .sql » extension. If it doesn’t, you will need to select SQL from the « Format » drop-down menu.
5. Restoring a manual backup
To restore a backup made as described above, you should proceed in two steps and restore the files on the one hand and the database on the other. In any case, I recommend that you perform a full backup before restoring anything. That way, if the process fails, you’ll always have the option of going back.
5.1 Restoring files
To restore your files, you will need to connect via FTP to your server again. If you have saved your connection data, this step will be very quick. If not, I invite you to consult the paragraph above dedicated to the connection via FTP.
After connection, you can proceed to the reverse of a backup and copy your files from your computer to your server. Be sure to keep the structure of the folders and files. Indeed, paths are essential in WordPress and a misplaced file could cause an error.
5.2 Restoring the database
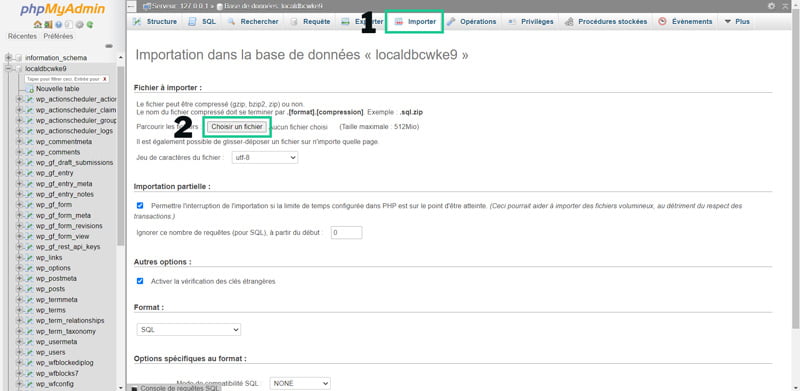
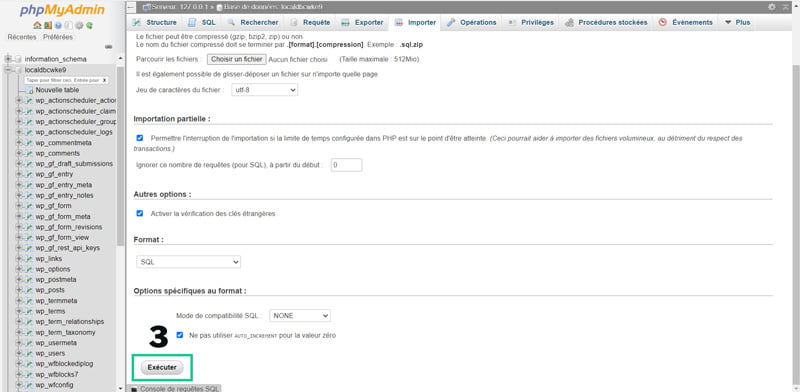
Finally, you will need to log into phpMyAdmin again to restore your database. To do this you will need to follow the instructions mentioned above, but after selecting the appropriate database you wish to restore, click Import, not Export. Then, by clicking on the « Choose a file » button, you will be able to select the backup file for your database before clicking on Run.
6. Conclusion
No matter which method you choose, the most important thing about a backup is still to do it regularly and at least every time your site is modified. Without it, you inevitably run the risk of having your site wiped out by a trivial error, whether you are responsible for it or not.
Let me know in the comments which backup process you have in place.

 Sauvegarde WordPress : extension, FTP et restauration
 Sécuriser WordPress wp-login.php
 Comment importer une base de données WordPress dans phpMyAdmin